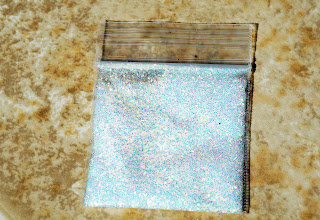
I have recently decided to embark on a new adventure with creating my own nail polishes. Yeah, you heard that right! I'm trying this whole "frankening" thing. I wanted to share with you all my recent loose glitter purchase from an Etsy shop.
So if you don't know what "frankening" is, then I'll explain this magical process. It's basically a term used loosely to describe homemade nail polishes. As to were or from whom that word came from, who knows. I have become familiar with the Etsy website and I have found many glorious things there. If you've never checked out the site, please do (link is at the end of this post). I found several listings of homemade nail polishes where most of them are pretty affordable. I wanted to order tons, and a thought just popped into my head. If these sellers can make them to sell, then why can't I? I'm not looking into selling my creations....yet! We'll see how this turns out first. Besides this way more fun and cheaper.
There have been many videos on YouTube and tons of blogs about "frankening" at home. Many of those can be useful. I tried to find as much information as possible to make a wise decision on what types or kinds of glitters to use and buy, the proper solution for making the polishes, materials needed and of course where to start this new hobby. After doing research, I was left with several questions needing answers which is why I feel some videos and blogs weren't completely helpful. So I have put a lot of effort into this idea and I would like to share my tips with you. I plan on doing several posts on this process, so if you want to know more as I go along then follow me on Twitter
One of my first glitter purchases from The Glitter Source on Etsy. This shop has tons of glitters available for nail polishes and crafts. Every possible size, shape and color is available. A bonus is that they are very affordable. If you want to browse their site click here---> Theglittersource
I purchased their Solvent Resistant Holographic Glitter Sampler set for $12 and it includes 8 small 2"x2" zip lock bags with about 1 teaspoon of glitter. I know 1 teaspoon of glitter doesn't sound like much but it will make several polishes especially when mixing different sizes and colors into one nail polish bottle. These little zip lock bags contain a generous amount too. The average amount of glitter sold individually through various glitter sellers on Etsy is about 1 teaspoon. A lot of sellers have larger amounts available for a little bit more money. I personally like sampler sets since it offers lots of color options more affordably like the one below.
It is very important to use Solvent Resistant glitter for making nail polishes. Why? Because being solvent resistant ensures that your polishes won't become tinted from the glitter color fading into the polish solution. Solvent resistant glitters perform better than craft glitter when put into glitter suspension base. I have tried the whole mixing clear polish with craft glitter and wasn't too pleased with the results. I will share that with you soon. I will do a post on glitter suspension bases as well so stay tuned. Below are pictures taken in direct sunlight to show you all how beautiful these glitters are. I have enlarged the photos to display the holographic effect of these glitters. Holographic finishes are an extremely popular nail trend at the moment. More posts are coming in the future of d.i.y nail polishes and tips.
 |
| Solvent Resistant Holographic Sample set $12 |
 |
| Jet Black |
 |
| Sparkly white |
 |
| Rainbow Purple |
 |
| Rainbow Teal |
 |
| Rainbow Gold |
 |
| Rainbow Turquoise |
 |
| Rainbow Rose |
I really love the finishes of these glitters. I can't wait to share my creations with you all. Video will be coming soon too!
Shop on Etsy: https://www.etsy.com/?ref=si_home
Follow me on Twitter: https://twitter.com/glamourbylexi
I hope you found this helpful. Any questions or comments, please leave them below :) Thanks for stopping by,
xoxo
~Lexi
not sponsored
not sponsored
No comments:
Post a Comment